Replacing your roof is a major home improvement project, and if you’ve never been through a roof replacement before, you may be wondering exactly what to expect.
How noisy will it be? Where should you park? What happens to the old shingles? What if we find damaged plywood underneath your roof?
At DWM Roofing, we want our customers to know what to expect before installation day arrives. While every home and roof is a little different, here’s a step-by-step look at our roof replacement process, from preparing your home and material delivery through installation, cleanup and final inspection.
Step 1: Prepare Your Home Before Roof Replacement Day
Inside Your Home
Before our crew arrives, there are a few things we ask you to do inside and outside your home. Roof replacement involves a lot of hammering, walking and equipment moving across your roof. Those vibrations can travel through the walls and ceilings of your home. Before installation day, remove valuable, fragile or breakable items from walls, ceilings and shelves—especially anything that could fall due to vibration.
If you have an unfinished attic, garage or shed, we recommend covering stored belongings with old sheets or drop cloths. Dust and small debris can fall into these spaces while our crew is working above them. If your garage or shed does not have a finished ceiling, we highly recommend removing any vehicles during installation.
If you have items mounted to your roof, such as a satellite dish, antenna, basketball net or wiring, let us know before installation. DWM Roofing can remove items attached to the roof, but certain items may need to be reinstalled by the appropriate service provider. You should also be prepared to do some vacuuming in these areas after construction is complete.
Outside Your Home
Your driveway needs to be completely clear of all vehicles before both your material delivery and installation dates. Make sure any vehicles you may need are out of the garage ahead of time as well. We also ask that you clear the area surrounding your home. During tear-off, old shingles, nails, plywood and other roofing materials will be coming off the roof.
Think of approximately a 30-foot radius around your entire home as our work zone. Please move grills, hoses, patio furniture, potted plants, lawn ornaments, landscape lights, children’s toys and other movable items outside of this area. If possible, trim any low-hanging tree branches near the roof and cut your grass the day before installation. Short grass helps prevent fallen debris from hiding in the lawn and allows us to perform a more thorough cleanup. (An average roof contains 7-10 thousand nails that will be removed)
Step 2: Your Roofing Materials Are Delivered
Before your roof replacement begins, the materials for your new roof will be delivered to your home. This is why we ask that your driveway be completely clear of all vehicles on the material delivery date. Here’s a look at what you can expect when the roofing materials for your DWM Roofing project are delivered:
Step 3: We Remove Your Existing Roof
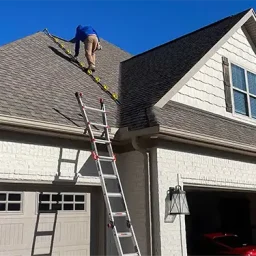
On installation day, our crew prepares the work area and then begins the tear-off. We remove the existing shingles and roofing materials so we can get down to the roof decking underneath. Throughout the day, you’ll hear footsteps, hammering, nail guns and the sound of old roofing materials being removed. If you work from home, have small children or have pets that are sensitive to loud noises, we recommend making arrangements to be somewhere else for the day.
Watch a Full DWM Roof Replacement From Start to Finish
Want to see what installation day actually looks like? This time-lapse follows one of our roof replacements from the beginning of the project through the completed roof. It’s a great way to see just how much happens in a single roof replacement—from tear-off and preparation through installation and cleanup.
Step 4: We Inspect the Roof Decking
Once the old roofing materials have been removed, we can see the actual condition of the roof decking underneath. We inspect the plywood for deterioration, rot, soft areas and other damage that needs to be addressed before we install your new roofing system. This is one reason a roofing estimate may include provisions for additional plywood. Even with a thorough inspection beforehand, we cannot see everything underneath your shingles until the existing roof is removed. If damaged decking is discovered, it needs to be properly addressed so the new roofing system has a solid surface underneath it.
Step 5: We Install Your New Roofing System
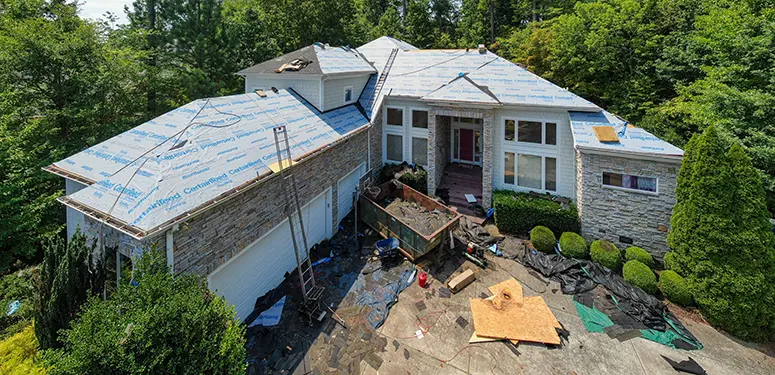
A new roof is much more than the shingles you see from the street. Once the roof deck is ready, we begin installing the components of your new roofing system. Depending on your home and the roofing system being installed, this can include:
- Ice and water protection
- Roofing underlayment
- Drip edge
- Starter shingles
- Flashing
- Ventilation components
- Ridge cap shingles
Each component has a specific purpose and works together to help protect your home from water and the elements. At DWM Roofing, we install quality roofing products from all major manufacturers.
Step 6: We Address Flashing and Roof Penetrations
Some of the most important parts of your new roof are areas you may barely notice once the job is complete. Chimneys, walls, valleys, plumbing pipes, skylights and other roof penetrations require careful attention. We make sure these areas are properly flashed and addressed as part of your roof replacement to help prevent water from entering vulnerable areas. If your home has skylights, we’ll also discuss their condition as part of the roof replacement process. DWM Roofing recommends replacing skylights when replacing the roof because the skylight and surrounding roofing materials are interconnected. DWM does not warranty existing skylights.
Step 7: We Install Your New Shingles
Once the roof is properly prepared, we install your new shingles across the roof. Your shingles are installed as part of the complete roofing system, including the appropriate starter shingles and fastening methods. This is when you’ll really begin to see the transformation of your home. A new roof doesn’t just protect your house—it can make a noticeable difference in its overall appearance and curb appeal.
Step 8: We Install the Ridge Vent and Ridge Cap
After the shingles are installed, we finish the roofing system at the ridge. When applicable, the ridge vent is installed at this stage, followed by the ridge cap shingles. The ridge vent is an important part of the home’s attic ventilation system, allowing hot, moist air to escape through the highest point of the roof. Once the ridge vent and ridge cap are installed, the roofing portion of the project is complete. If you’re unfamiliar with terms such as roof decking, underlayment, flashing, ridge vents or starter shingles, visit our Roofing Terms & FAQs page for explanations of common roofing terminology.
Step 9: We Inspect Your Finished Roof
Once installation and cleanup are complete, the finished roof will be inspected. We’ll make sure the roofing system and important details have been properly completed and that the property has been cleaned up. Once everything is complete, you can enjoy your new roof knowing the project has been finished from tear-off through final inspection.
How Long Will Your Roof Replacement Take?
Most DWM Roofing projects take one day to complete, although larger homes may require one to two days. The timeline can also vary depending on the size and complexity of the roof, roof pitch, weather conditions and any decking repairs that are needed. Some projects may take longer depending on the size and complexity of the roof, roof pitch, the amount of plywood that needs to be replaced, chimneys or skylights, property access and weather conditions. We’ll discuss what to expect for your particular project before your installation. Weather can also affect when your roof replacement can be completed. If you’re still deciding when to schedule your project, read our guide to the best time to replace a roof in Central Maryland.
Do You Need to Be Home During Your Roof Replacement?
No. In most cases, you do not need to stay home while we replace your roof. In fact, because of the amount of noise and vibration involved, you may be more comfortable making arrangements to be somewhere else for the day. However, there may be situations where we need access to the inside of your home—for example, if your project involves an attic fan, skylights or another area that requires interior access. We’ll let you know ahead of time if someone needs to be home. We simply need to be able to reach you if something unexpected comes up during your project. Before you leave, make sure your driveway is completely clear and that we’ve discussed anything else we may need access to during the day.
What Warranty Comes With a Roof Replacement?
Full roof replacements from DWM Roofing come with a 10-year labor warranty from DWM, in addition to the manufacturer’s warranty on the roofing materials. Warranty coverage can vary depending on the roofing products selected, so we’ll explain the applicable warranties as part of your project.
Getting Ready for Your DWM Roofing Roof Replacement
As you can see from our roof replacement time-lapse, a lot happens during installation day. Our goal is to keep the process organized from the time your materials are delivered through the final inspection and cleanup. If you’re not sure whether your roof needs a complete replacement, DWM Roofing also provides roof repair services.
A little preparation on your part can make a big difference. Clearing your driveway, moving belongings away from our work zone, protecting items in your attic or garage, trimming nearby branches and cutting the grass all help our crew work efficiently while helping protect your property.
At DWM Roofing, we provide residential asphalt shingle roof replacement throughout Central Maryland. DWM Roofing provides residential asphalt shingle roof replacement throughout Central Maryland, including Howard, Carroll, Frederick, Baltimore, Anne Arundel and Montgomery counties. If you’re considering replacing your roof, contact DWM Roofing to schedule an estimate and learn more about our roof replacement process.